Need a C sharp guide that gets you building real-life applications quickly? C# is a modern, object-oriented programming language developed by Microsoft that runs on the .NET platform. You can use it to build Windows applications, web applications, mobile apps, games using Unity, and enterprise software systems. This detailed guide to C# covers everything from setting up your development environment to understanding csharp basics like variables, control flow, and methods. You'll also get an introduction to object-oriented programming and build your first functional application. You'll have the foundation you need to start creating your own projects.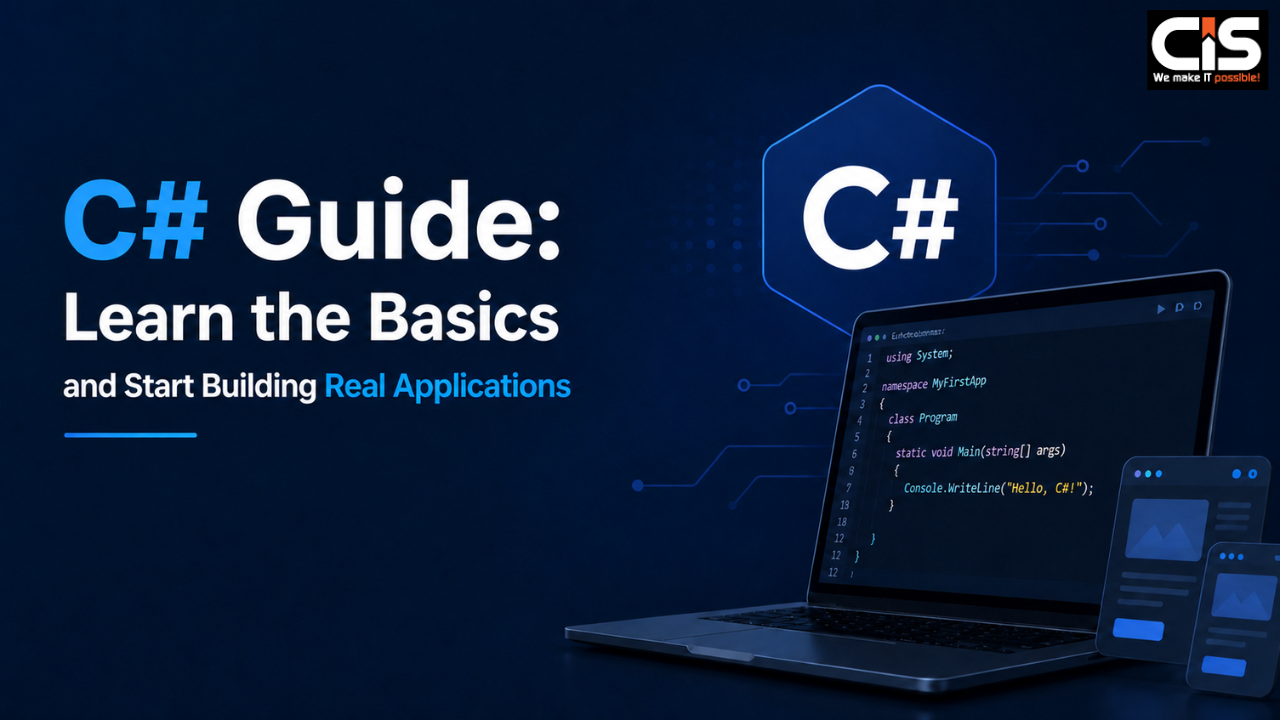
What is C# and Why Learn It?
C# is a general-purpose, high-level programming language that Anders Hejlsberg, Scott Wiltamuth, and Peter Golde designed at Microsoft. First distributed in July 2000, it became an international standard by Ecma in 2002 and ISO/IEC in 2003. This guide to c# will show you why mastering this language opens doors across multiple development domains.
What C# is used for
You can build almost anything with C#. The language runs on different devices, from Internet of Things (IoT) solutions to cloud applications. Here's where C# shines:
- Desktop applications for Windows, macOS, and Linux using WPF, WinForms, or cross-platform frameworks like AvaloniaUI
- Web applications and APIs through ASP.NET Core, which handles everything from single-page applications to enterprise-level web services
- Mobile apps using .NET MAUI, Microsoft's cross-platform framework that replaced Xamarin and works on iOS, Android, and Windows
- Game development with Unity, one of the most popular game engines where C# is the main scripting language
- Cloud-native services on Azure or AWS Lambda, where you write business logic without managing entire applications
- Enterprise software that requires complex architecture and integration with other services
Major applications built with C# have Microsoft Office Suite, Microsoft Teams, AutoCAD, GitHub Desktop, and Paint.NET. Companies worldwide rely on C# for their critical systems. Stack Overflow uses C# and ASP.NET Core to handle millions of concurrent users.
Key benefits of C#
C# offers practical advantages that matter for your development work. The language is approachable for beginners yet provides advanced features for experienced developers. You'll find C# straightforward to learn if you already know object-oriented programming languages like Java or C++.
Strong typing catches errors during compilation rather than runtime. You fix problems before your code ever runs. The compiler tells you right away if you're using a type the wrong way. Automatic garbage collection handles memory management, so you don't wrestle with memory leaks like you would in C++.
C# developers are in high demand. Microsoft's continuous investment in .NET guarantees the language stays current with yearly releases that add new features and improvements. On top of that, the .NET ecosystem provides over 300,000 NuGet packages with reusable code for your applications.
Asynchronous programming support through async/await syntax makes building responsive, scalable applications easier. Language Integrated Query (LINQ) gives you a common pattern to query and transform data collections. These features boost productivity without sacrificing performance.
C# vs other programming languages
C# and Java share striking similarities in syntax and object-oriented principles. Both use C-style syntax, but C# offers more modern language features that make development more efficient. To name just one example, C# has var keyword for implicit typing, string interpolation, and collection initializers that Java lacks.
C++ requires manual memory management and compiles to machine code. C# compiles to Common Language Runtime and handles memory on its own. This makes C# safer and faster to develop with, though C++ might edge ahead for performance-critical system-level applications.
Python offers simpler syntax for beginners, but C# provides stronger type safety that prevents runtime errors. The trade-off is learning curve versus catching bugs early. JavaScript developers who transition to C# often find familiar concepts, making the switch smoother.
C# syntax feels familiar if you've used C, C++, JavaScript, TypeScript, or Java. This family resemblance means learning C# gives you transferable knowledge. The language supports multiple programming paradigms that cover object-oriented, functional, and component-oriented approaches.
One key advantage: C# works across the entire development stack. You don't need separate languages for backend, frontend, mobile, or desktop development. Your skills maximize return on investment across different project types as a result.
Need Expert Software Developers?
Skip the learning curve entirely. Let our experienced engineering team build robust and scalable enterprise applications for your business.
Setting Up Your C# Development Environment
Your development tools determine how smoothly you'll learn this c sharp guide. Two main options exist: Visual Studio and Visual Studio Code. Both work exceptionally well, but they serve different needs.
Installing Visual Studio
Visual Studio is Microsoft's full-featured IDE built for .NET and C# development. Head to the official Visual Studio website and download the Community Edition, which is free for individual developers and small teams. The installer file (VisualStudioSetup.exe) downloads to your system.
Run the installer and you'll see a workload selection screen. Choose .NET desktop development to get all the tools you need for C#. This workload has compilers, project templates and debugging tools. The installation takes several minutes depending on your internet speed. Launch Visual Studio from your Start menu once complete.
You need administrator permissions on your machine for the original installation. Make sure your computer meets the system requirements and has the latest Windows updates applied before starting. Visual Studio 2022 works on Windows 10 and later versions.
Visual Studio asks you to sign in (optional) and select development settings plus a color theme when you first open it. After this one-time setup, you're ready to create projects.
Setting up Visual Studio Code
VS Code offers a lightweight alternative that runs on Windows, macOS and Linux. Download it from the Visual Studio Code website and install it on your operating system. The editor itself doesn't have C# support by default.
Open VS Code and go to the Extensions tab on the left sidebar. Search for C# Dev Kit and install the official extension published by Microsoft. This extension provides syntax highlighting, IntelliSense code suggestions and debugging capabilities. To name just one example, IntelliSense suggests completions and shows documentation when you type code.
Installing .NET SDK
Both Visual Studio and VS Code require the .NET SDK to compile and run C# programs. Visual Studio has the SDK during installation, but VS Code users must install it separately.
Visit the official .NET download page at dotnet.microsoft.com. You'll see the latest versions available. As of now, .NET 9.0 (Standard Term Support) and .NET 10.0 (Long Term Support) are the current releases. Download the SDK installer for your operating system.
Verify it worked correctly after installation. Open a terminal or command prompt and type dotnet --version. The command returns your installed SDK version number and confirms everything is set up properly. If you see an error, the installation may have failed or the path wasn't set correctly.
The SDK has several command-line tools you'll use frequently. The dotnet command creates projects, restores dependencies, builds code and runs applications. Type dotnet --info to see detailed information about your SDK and runtime versions.
Creating your first C# project
Creating a project differs between Visual Studio and VS Code. Click Create a new project from the welcome screen in Visual Studio. Search for Console App in the template list and select it. Name your project (HelloWorld works great for beginners) and choose a save location. Click Create and Visual Studio generates the project structure.
VS Code users should open a terminal and go to where you want your project folder. Run dotnet new console -o HelloWorld. This command creates a new console application in a folder named HelloWorld. The -o flag specifies the output directory name.
Go into your project folder with cd HelloWorld and run dotnet run. Your program compiles and executes, displaying "Hello, World!" in the terminal. That simple output proves your entire development environment works correctly.
Open the project folder in VS Code to see its structure. You'll find a Program.cs file containing your C# code. The file uses top-level statements by default in .NET 6 and later versions, showing just Console.WriteLine("Hello, World!"); without the traditional namespace and class structure. This simplified syntax helps beginners focus on csharp basics without getting overwhelmed by boilerplate code.
You now have a functioning development environment ready for this guide to c sharp. The tools are installed, configured and tested with your first successful program run.
C# Basics: Understanding the Core Syntax
Every C# program shares fundamental building blocks that you need to understand before diving deeper. This piece on c# breaks down the syntax step by step.
Your first Hello World program
The simplest C# program prints text to your screen. Create a new file named hello-world.cs and add this single line: Console.WriteLine("Hello, World!");. Run it from your terminal with dotnet run hello-world.cs and you'll see "Hello, World!" appear.
What just happened? Console is a type that represents your console window. WriteLine is a method that belongs to the Console type and prints a line of text to that console. Everything you want to print goes inside the parentheses (). The text itself sits within double quotes "".
String interpolation gives you a better way to combine text with variables. Place a $ before the opening quote, then include variables inside curly braces {} within your string. Take this example: Console.WriteLine($"Hello {aFriend}"); replaces {aFriend} with the variable's actual value.
Understanding C# program structure
Two valid formats exist for structuring C# programs. The modern approach uses top-level statements where you write executable code without wrapping it in a class and Main method. This style became the default with .NET 6. You write Console.WriteLine("Hello, World!"); in your Program.cs file.
The traditional format requires more boilerplate code. It starts with a using directive that references namespaces. Namespaces organize C# programs and libraries in a hierarchy. To name just one example, the System namespace contains many types including the Console class, plus other namespaces like IO and Collections.
A namespace declaration groups related classes together. You define a class that contains your program logic inside the namespace. The Main method serves as the entry point where program execution begins. Any code inside Main's curly brackets {} gets executed. Both formats compile to identical code.
The compiler synthesizes the containing class and Main method when you use top-level statements. Only one file in a project can have top-level statements, and the entry point is the first line of program text in that file. Larger programs benefit from the traditional explicit structure for better organization.
Simple syntax rules and conventions
C# is case-sensitive, which means MyClass and myclass have different meanings. Variable names with different capitalization are treated as separate variables. This sensitivity extends to all identifiers including classes, methods and variables.
Every statement ends with a semicolon ; to indicate the command's completion. The semicolon tells the compiler where one instruction ends and the next begins. Forgetting it ranks among the most common beginner mistakes. Take these examples: int x = 10; and Console.WriteLine(x); both require semicolons.
Curly braces {} mark the beginning and end of code blocks. They group statements together in functions, loops and conditional statements. Proper indentation improves readability, though C# ignores extra spaces and newlines. Whitespace flexibility means multiple lines make code more readable without affecting compilation.
Comments explain your code. Single-line comments use // while multi-line comments start with /* and end with */. Compilers ignore comment entries. You can document your logic without affecting program execution.
Valid identifiers follow specific rules. Names must begin with a letter followed by letters, digits or underscores. The first character cannot be a digit. Identifiers cannot contain spaces or symbols like ? - + ! @ # % ^ & * ( ) [ ] { } except underscores. They cannot be C# keywords either.
Working with Variables and Data Types
Variables store data that your programs manipulate and process. Think of them as labeled containers holding specific types of information. This piece about C# shows you exactly how to work with them.
Declaring variables in C#
You must specify a variable's type before using it. The syntax follows a simple pattern: type variableName = value;. To cite an instance, int num = 100; creates an integer variable named num with the value 100. The type comes first, then the variable name, followed by the assignment operator and value.
You can declare variables without immediate initialization. Write int myNum; first, then assign myNum = 15; later. But C# won't let you use unassigned variables. Any attempt to reference one triggers a compile-time error. This safety feature prevents bugs before your code runs.
Multiple variables of the same type can be declared together. Use int a, b, c; or even int a = 3, b = 2, c = a + b; to declare and initialize at once. Commas separate them and keep your code concise. You can reassign new values anytime once declared: myNum = 20; overwrites the previous value.
Common data types (int, string, bool, double)
The int data type stores whole numbers from -2,147,483,648 to 2,147,483,647. It's your go-to choice for counting, indexing, and integer math.
The double type handles decimal numbers with 15-16 digit precision. It represents values from about 5.0 × 10⁻³²⁴ to 1.7 × 10³⁰⁸. Use doubles for scientific calculations or financial computations that need decimal precision. Declare them with double myDouble = 5.99;.
Boolean variables use the bool keyword and hold only true or false. These work well for flags, conditional checks, and state tracking. The bool type stands separate from integral types. You cannot substitute a bool where an integer belongs, and vice versa.
Strings store sequences of characters surrounded by double quotes. Declare them with string name = "John";. Strings are reference types, whereas int, double, and bool are value types.
Type conversion and casting
C# performs implicit conversions when moving from smaller to larger types. An int converts to double without your intervention: int num = 2147483647; long bigNum = num; works naturally. The conversion happens because a long holds any value an int can store.
Explicit conversion requires manual casting when data loss might occur. A double-to-int conversion truncates decimal places. You must use parentheses: double x = 1234.7; int a = (int)x; produces 1234. The cast operator tells the compiler you accept potential precision loss.
Built-in methods offer another conversion path. The Convert class provides Convert.ToInt32(), Convert.ToDouble(), and Convert.ToString() for various transformations. These methods handle conversions that casting cannot perform.
Constants and their uses
The const keyword declares unchangeable values. Write const int X = 0; or const string ProductName = "Visual C#";. Constants require initialization at declaration. An attempt like const float max; without a value triggers an error.
Constants get embedded into compiled code. Any change requires recompiling dependent assemblies. Use constants for mathematical values like Pi or configuration settings that never change. They prevent accidental modifications and make code more readable.
Master Core Programming Concepts
Build a solid foundation by understanding exactly how data flows through your software. Get personalized help with complex coding challenges.
Control Flow and Decision Making
Program execution doesn't always follow a straight path. Your code needs to make decisions, repeat actions, and respond to different conditions. This piece on C# covers the mechanisms that control how your program flows.
If-else statements
The if statement executes code only at the time a Boolean expression evaluates to true. Write your condition inside parentheses followed by code in curly braces. To cite an instance, if (temperature < 20) { Console.WriteLine("Cold."); } checks temperature and prints so.
Adding an else part creates two execution paths. The program selects one based on your Boolean condition. The else block runs instead at the time the if condition fails. You can chain multiple conditions using else if between the original if and final else. Each condition gets checked from top to bottom sequentially. That code block executes and control jumps out as soon as one evaluates to true.
Switch statements
The switch statement selects code paths based on pattern matching with an expression. It evaluates your expression once, then compares against each case pattern. The syntax requires case labels followed by a colon, your code, and a break statement.
Each switch section needs a break to prevent fall-through. Control cannot continue from one case to the next. You can stack multiple case patterns for one code section at the time they share the same output. The default case handles values that don't match any other pattern. Case patterns get evaluated in text order from top to bottom.
Comparison and logical operators
Comparison operators return Boolean values. The < operator returns true at the time the left operand is less than the right. The > checks greater than, and <= checks less than or equal. The equality operators == and != test if operands are equal or not equal.
Logical operators combine Boolean expressions. The && operator returns true only at the time both operands are true. The || returns true if either operand is true. The ! operator reverses the result and turns true to false and vice versa.
The && and || operators use short-circuit evaluation. The && skips evaluating the right side at the time it finds a false left operand. The || skips the right operand at the time the left evaluates to true. This optimization improves performance in conditional checks.
Loops: for, while, and foreach
Loops execute statements based on conditions repeatedly. The for loop runs a fixed number of iterations at the time you know the count beforehand. Its syntax has initialization, condition, and increment: for (int i = 0; i < 5; i++).
The while loop checks its condition before each iteration. Code inside executes only while the condition remains true. The do-while variation checks the condition after executing and guarantees at least one iteration.
The foreach loop iterates through collections like arrays. It requires simpler syntax: foreach (string item in items) processes each element without manual indexing.
Break and continue keywords
The break statement terminates the closest loop. Control passes to whatever follows the loop. The break only exits the innermost loop containing it at the time it appears in nested loops.
The continue statement skips the current iteration and jumps to the next one. It transfers control back to the loop's beginning for the next iteration. Use continue to filter unwanted values or bypass processing for specific conditions.
Methods and Code Organization
Code repetition throughout your program creates maintenance headaches. Methods solve this by packaging reusable code blocks that execute when called. A method contains a series of statements that perform specific tasks. Every executed instruction in C# runs within a method's context.
Creating and calling methods
You declare methods inside classes by specifying access level, return type, name, and parameters. To name just one example, static void MyMethod() { Console.WriteLine("Executed!"); } creates a method named MyMethod. The static keyword means it belongs to the class itself rather than object instances. The void return type indicates no value gets returned.
You call a method by using its name followed by parentheses and a semicolon: MyMethod();. You can call the same method multiple times. When you call methods on objects, add a period after the object name, then the method name and parentheses. Arguments go inside the parentheses, separated by commas.
Method parameters and return types
Parameters let you pass data into methods. Define them inside parentheses with their type and name: static void Add(int a, int b) accepts two integers. Arguments provided during calls must match parameter types, though names can differ. C# passes value types by copy by default, so changes inside methods don't affect original variables. Reference types pass a reference to the object's location.
Methods return values using the return keyword. The return type specified before the method name determines what gets returned. Non-void methods require a return statement with a matching value type. To name just one example, static int MyMethod(int x) { return 5 + x; } returns an integer.
Method overloading
Method overloading means creating multiple methods with similar names but different parameters. You can vary the number of parameters, their types, or their order. To name just one example, void display(int a) and void display(int a, int b) coexist because parameter counts differ. Similarly, void display(int a) and void display(string b) work together due to different parameter types. Return types alone cannot distinguish overloads.
Understanding the Main method
The Main method serves as your program's entry point where execution begins. The runtime calls Main when starting your application. Valid signatures include static void Main(), static int Main(string[] args), and static async Task Main() among several others. An int return value communicates exit codes, where 0 indicates success.
Introduction to Object-Oriented Programming
Object-oriented programming organizes code by creating types through classes. This piece on c sharp shows you how to structure applications using OOP principles that make code reusable and maintainable.
Classes and objects explained
A class acts as a blueprint defining what objects will look like. Think of it as a template specifying attributes and behaviors. To cite an instance, a Dog class might define properties like name, breed, and age, plus methods like Bark(). The class itself occupies no memory until you create objects from it.
Objects are instances created from classes. When you write Dog tuffy = new Dog("tuffy", "papillon", 5, "white");, you're instantiating the Dog class. Each object holds its own state while sharing behavior defined in the class.
Constructors and properties
Constructors initialize objects and share the same name as their class. They cannot have return types. Write public Person(string name, int age) { this.name = name; this.age = age; } to set values when creating objects. Constructors run automatically when you use the new keyword.
Properties provide controlled access to private fields through get and set accessors. Instead of exposing fields, write public string Name { get { return name; } set { name = value; } } to confirm data.
Encapsulation basics
Encapsulation binds data and methods while restricting access to internal components. Private fields stay hidden. Public methods control interaction. Access modifiers like private, public, and protected determine visibility.
Simple inheritance example
Inheritance lets you create classes that reuse behavior from existing classes. The base class provides shared functionality while derived classes extend it. Use the colon syntax: class Car : Vehicle makes Car inherit from Vehicle. Derived classes gain all base class members except constructors.
Building Your First Real Application
You've learned the fundamentals. Now put them into practice by building a console calculator that performs real arithmetic operations.
Planning a console calculator
Define what your calculator needs to accomplish first. Simple requirements include accepting two numbers from users and performing addition, subtraction, multiplication, and division. Your calculator should display results and allow repeated calculations without restarting the program.
Implementing user input and output
Use Console.ReadLine() to capture user input as strings. Convert numeric input with Convert.ToInt32() for integers or Convert.ToDouble() for decimals. Display prompts with Console.WriteLine() and show calculation results using string interpolation.
Error handling basics
Wrap conversion code in try-catch blocks to handle FormatException when users enter non-numeric values. Check for division by zero before performing the operation[363]. The program should display meaningful error messages instead of crashing.
Testing your application
Calculation logic should move into separate methods outside Main for easier testing. This separation allows unit tests to verify operations without console dependency.
Next steps for improvement
You can add calculation history storage and support for multi-operation expressions with persistent logging for audit trails.
Bring Your Idea to Life
Transition from learning basic concepts to developing fully functional software. Let our team help you architect and launch your dream project.
Conclusion
You've traveled from installing your first IDE to building a functional calculator application. This piece on C# covered the fundamentals you need to start creating projects. Practice should be your focus now. Small applications built daily will strengthen your understanding of C# elements like variables, control flow and object-oriented programming.
C# opens doors in multiple development domains. Mobile app development companies like CISIN build cross-platform mobile solutions using these same principles you've learned. Console applications are a good starting point. Web apps using ASP.NET Core or mobile apps with .NET MAUI come next.
The language ecosystem continues growing with yearly updates that add powerful features. Your investment in learning C# pays dividends across desktop, web, mobile and game development. Pick a project idea that excites you and start coding today.